There are several ways to get data into Excel. This article covers the three you’ll use most: typing it in, letting AutoFill do the work, and inserting new rows into an existing table.
Typing data with the keyboard
This table shows the average daily gasoline sales and other (non-gasoline) sales at five service stations. It has three columns: Station, Gas and Other.
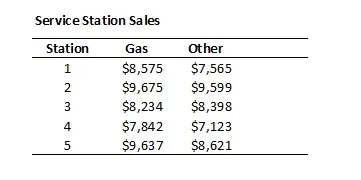
To type the first row:
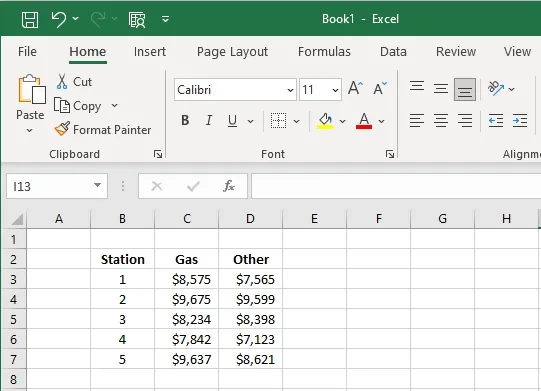
- Open Excel. You start with an empty workbook called Book1.
- Click cell B2.
- Type Station and press Tab to move right.
- Type Gas in C2 and press Tab.
- Type Other in D2 and press Enter.
After pressing Tab along a row, Enter takes you back to the start of the next row, where you began. That makes it quick to type a whole table.
- Type the numbers the same way.
Filling data with AutoFill
AutoFill continues a pattern for you when you drag the fill handle, the small square at the bottom-right corner of the selected cell. (For text patterns, also try Flash Fill.)
Example 1: numbers
-
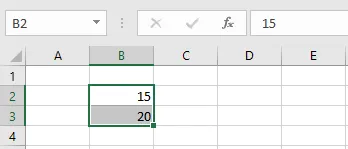
Type 15 in B2 and 20 in B3.
-
Select B2:B3 and drag the fill handle down.
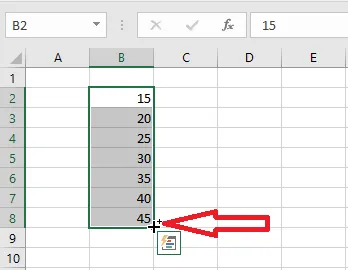
Excel sees that the numbers go up by 5, and continues the pattern: 25, 30, 35…
Example 2: months
-
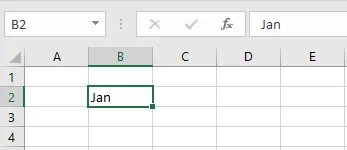
Type Jan in B2.
-
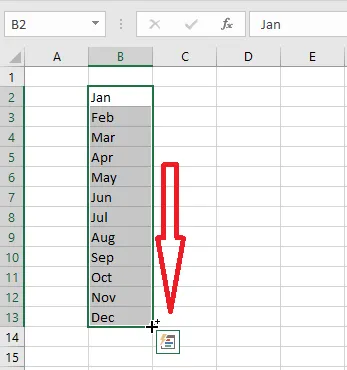
Drag the fill handle down. Excel fills in the following months.
Example 3: dates
-
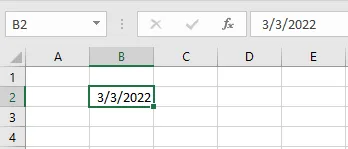
Type a date, such as 3/3/2022, in B2.
-
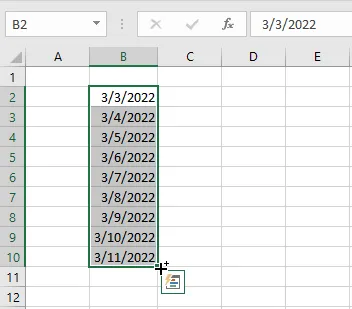
Drag the fill handle down. Excel fills in the following days.
Try it with days of the week too. For more options, see How to Use AutoFill.
Inserting new data
Say you want to add another station at the top of the earlier table.
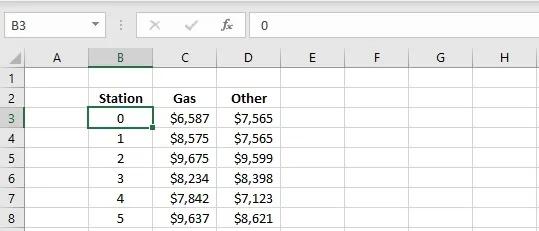
To add a row with 0, $6,587 and $3,453:
-
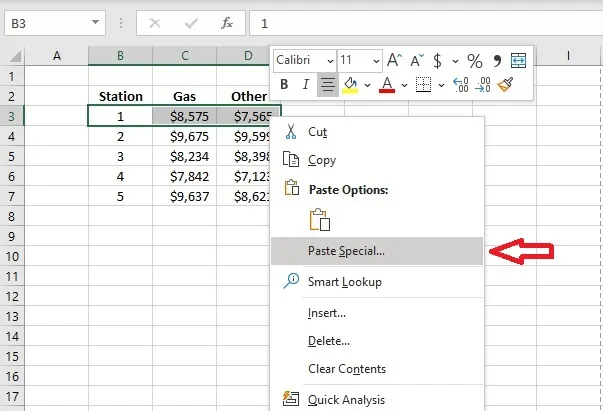
Select B3:D3.
-
Right-click the selection and click Insert.
-
Make sure Shift cells down is selected, and click OK.
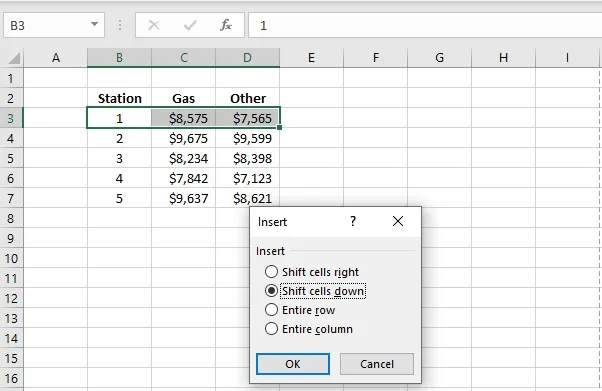
Excel moves the rows below down, leaving B3:D3 empty.
-
Type the new station’s data.
Tip: To insert a whole row instead, right-click the row number and click Insert, or choose Entire row in step 3.
Want to learn Excel step by step? Try the free Excel Essentials course.