Create Drop-down lists in Excel
Drop-down lists in Excel enable a user to select an item from a list without actually typing it. In other words, this could be used to restrict a user from entering information that is not wanted.
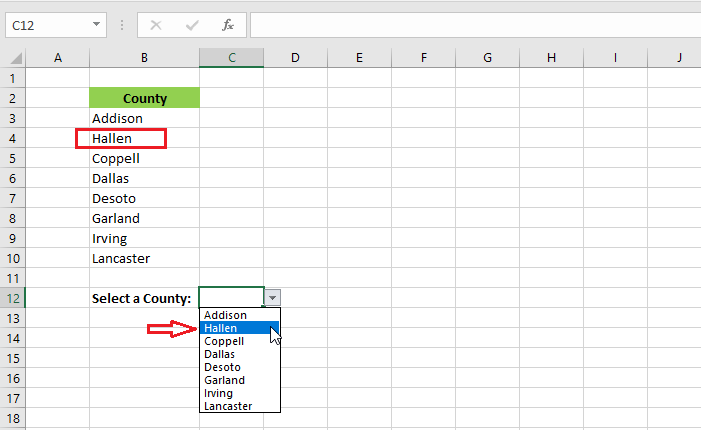
Creating a Drop-down List
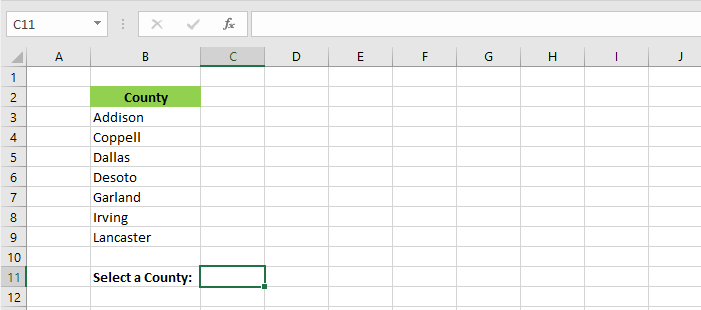
1. Type in your list in cells B3 to B9.
Note: You can type in this list anywhere in the spreadsheet or in a separate sheet. You can even hide the list so that users do not see it.
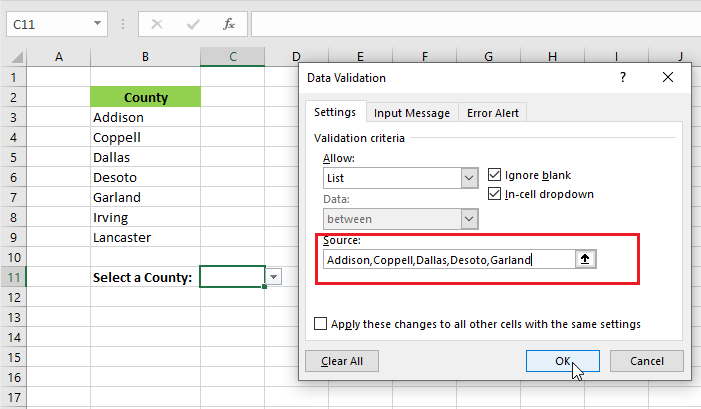
2. Select cell C11.
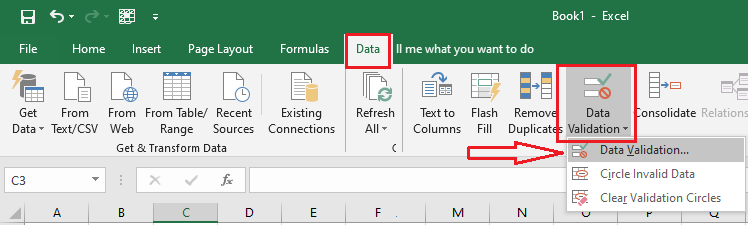
3. From the Data tab, click “Data Validation”.
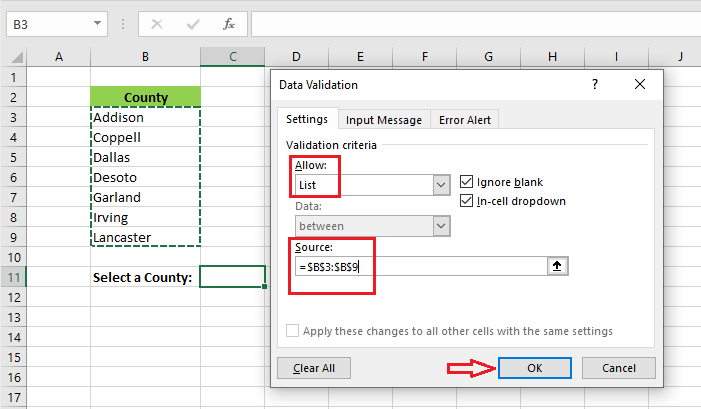
4. From the Settings tab of the Data Validation dialog box, select “List” in Allow box. In the source box, select the range of your list, which is B3:B9.
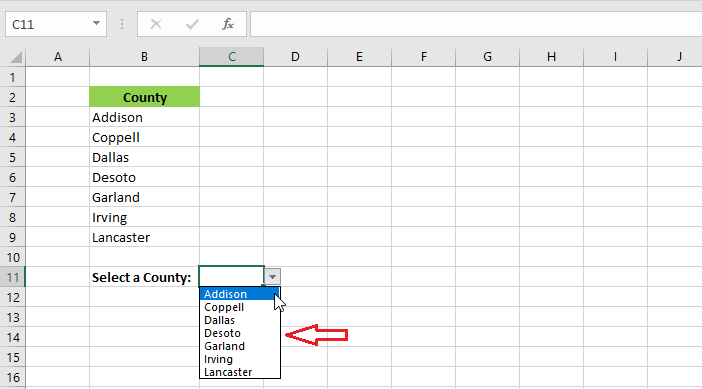
5. Click OK. The result is given below.
6. If you do not like to select a list or do not have the list, you can also directly type in your list in the source box.
Allowing Entries not on the list
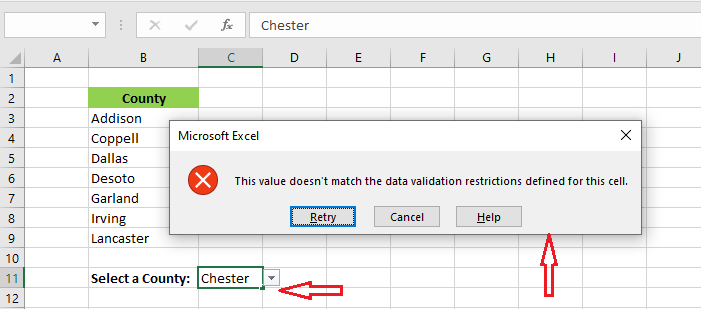
1. If you try to type in a value that is not in the list, Excel will show an error message.
Now, will learn how to allow the user to enter his value anyway.
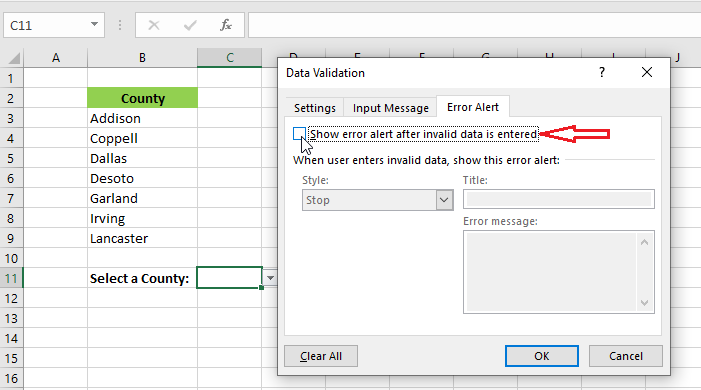
2. From the Data tab, click “Data Validation”.
3. On the Error Alert tab of the dialog box, uncheck the “Show error alert after invalid data is entered”.
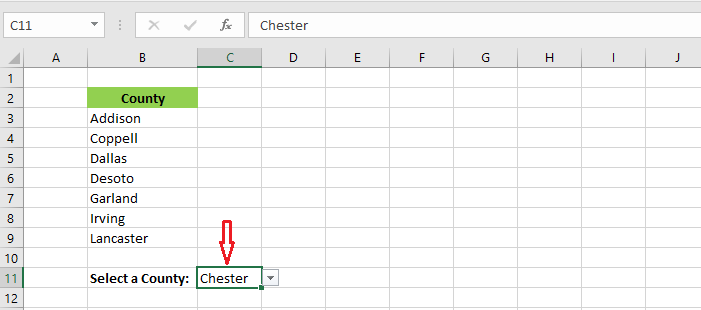
4. Click OK. The user can now enter a value that is not in the list.
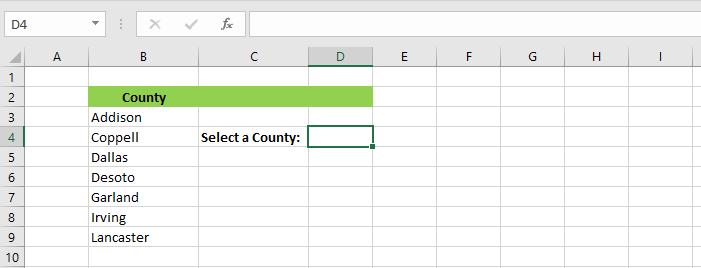
Add or Remove an item from the list
You can also add or remove items in the list by not going to the data validation tab.
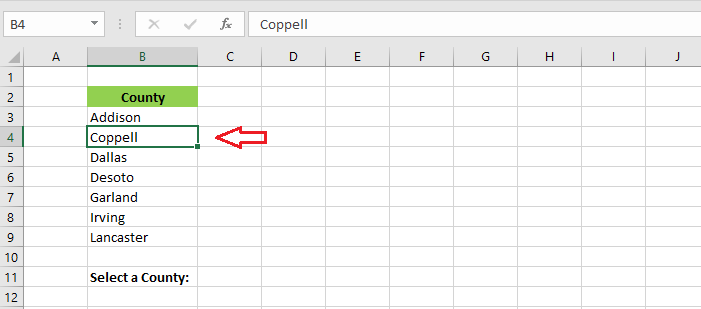
1. Select an item from the list. For instance, we select Coppell.
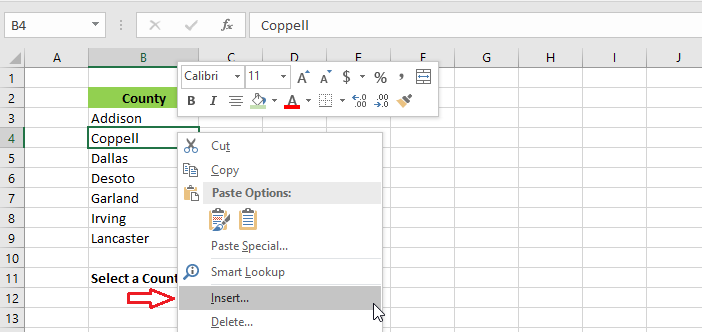
2. Right-click and click Insert.
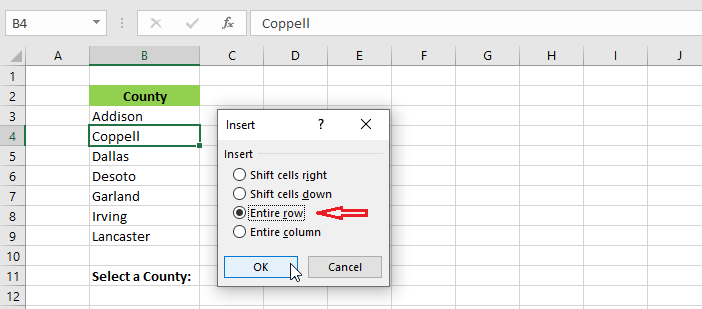
3. Select “Entire row” and click OK.
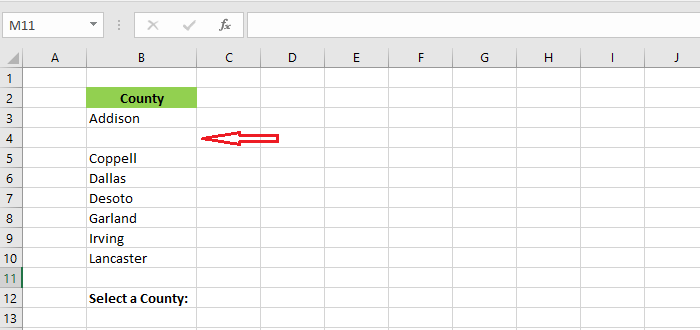
As shown below, Excel will create an empty row above the selected cell and the range reference in the data validation will automatically be adjusted.
4. Now, type in the new item in the empty cell (B4) and click the drop-down list.
5. To delete an item from the list, click delete in step 2 above and then follow the prompt.
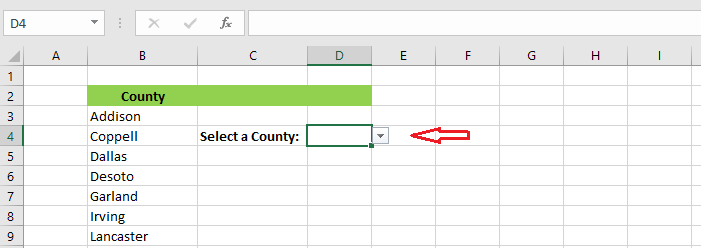
Create a Dynamic Drop-down List
To create a dynamic drop-down list wherein you can type in a new item in the list and Excel will automatically include the new item in the drop-down list, follow the steps below.
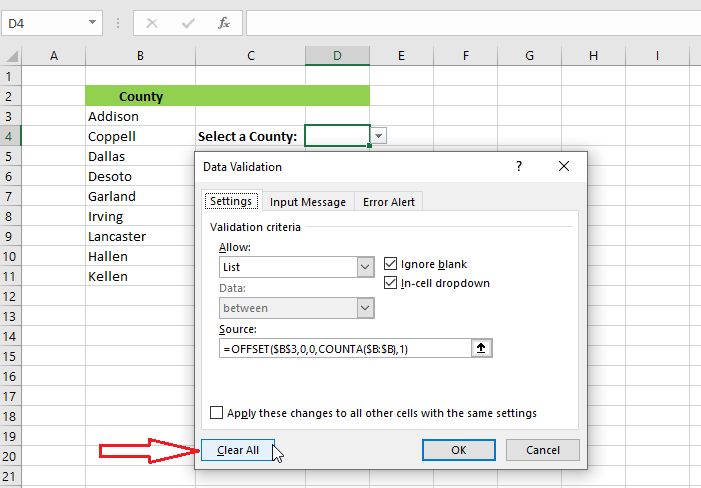
1. Select cell D4.
3. From the Data tab, click “Data Validation”.
4. From the Settings tab of the Data Validation dialog box, select “List” in Allow box. In the source box, type in the OFFSET function, which is =OFFSET($B$3,0,0,COUNTA($B:$B),1).
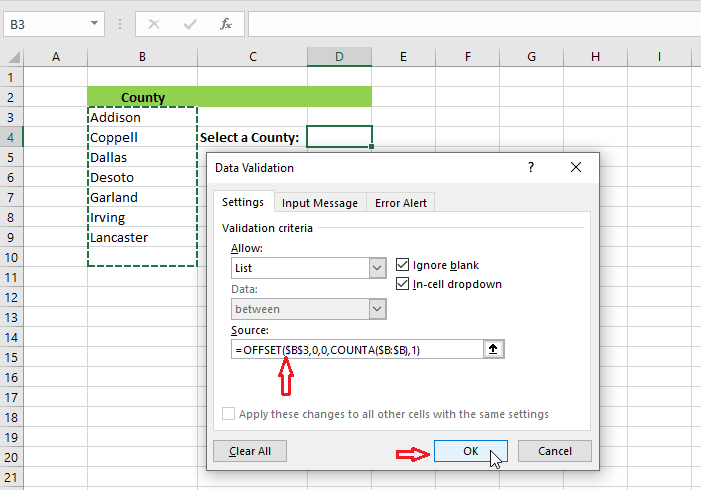
5. Click OK.
6. Now, add new items to the end of the list.
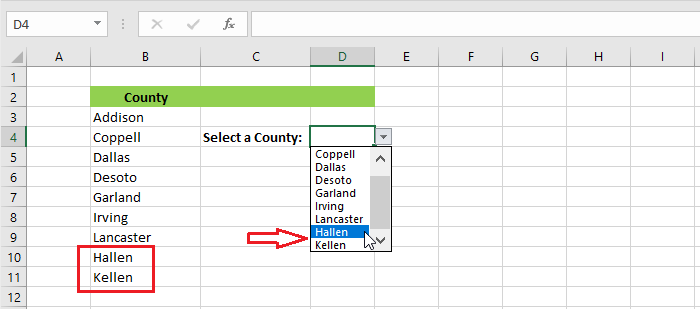
Result: The drop-down list has automatically included the new typed-in items.
Removing Drop-down List
To remove the entire drop-down list, do the following.
1. Select the cell that has a drop-down list. For instance, we select cell D4.
2. From the Data tab, click “Data Validation”.
3. From the dialog box, click “Clear All” and then click OK.
| 5 of 6 finished! Recommending more on Data Validation: Next Example >> |
| << Previous Example | Skip to Next Chapter 09: Using Templates |