Move Excel Columns
We can move Excel columns in at least three different ways: using Shift Key, inserting cut cells, and using the Excel menu.
Using Shift Key
1. Select a column. Hover the mouse pointer over the border of the selected cell. When a four-sided arrow appears, press and hold the Shift key then click and hold the left mouse button. Now move the column to a new location of your choice.
2. To see the result, release both the left mouse button and shift key on your keyboard.
Note: Holding down shift key allows moving column without overwriting existing data. Additionally, if you want to move multiple columns at a time, you can follow the same steps described above.
Inserting Cut Cells
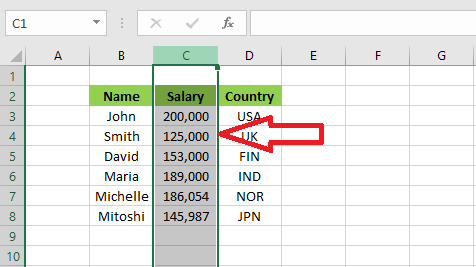
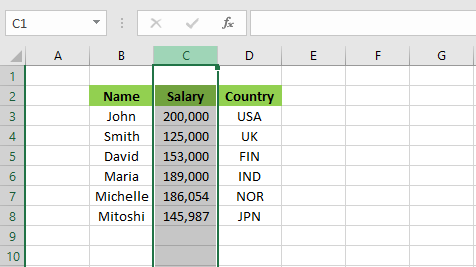
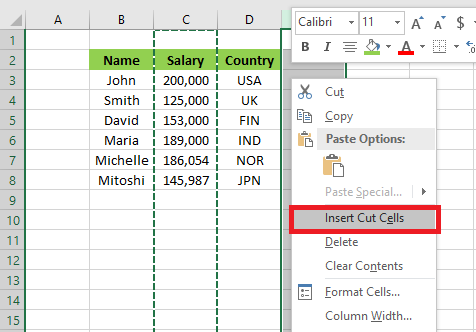
1. Select a column as in the picture below.
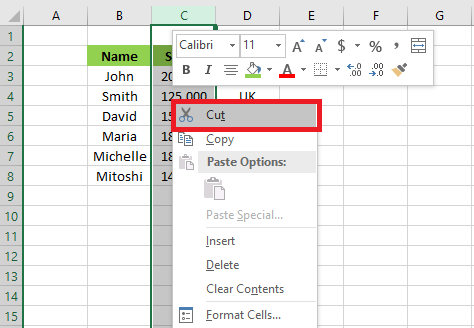
2. Right-click, and then click Cut.
3. Select a column where you want to insert the cut cell. Right-click and then click Insert Cut Cells
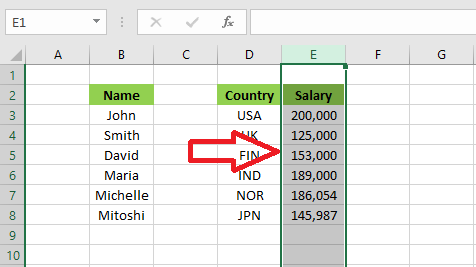
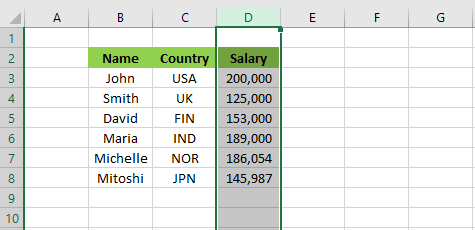
The result is given below.
Note: If you like to move multiple columns at a time, you can follow the same steps described above.
Using Excel Menue
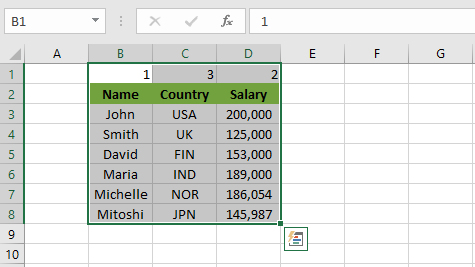
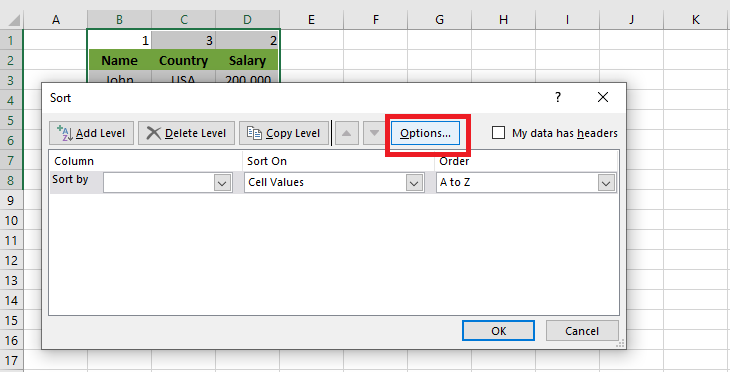
1. If you have a lot of columns to be rearranged in a single command, use the first row to indicate the new order of the columns. Select the entire data range.
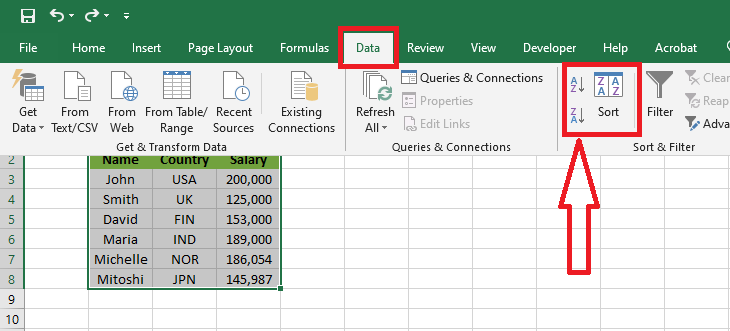
2. Select Sort & Filter group on the Data tab. Click Sort.
3. In the Sort dialog box, click Options.
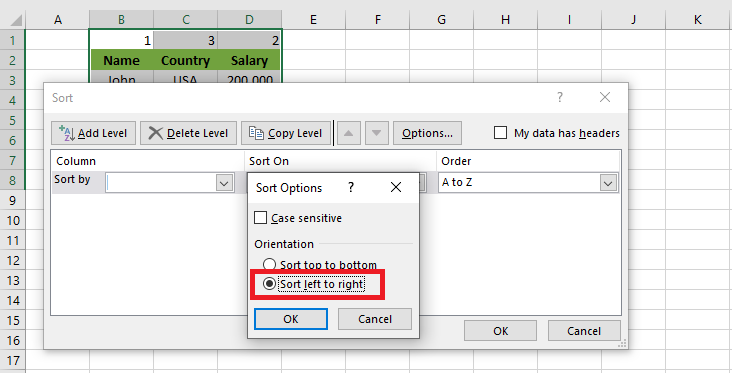
4. Click Sort Left to Right and click OK.
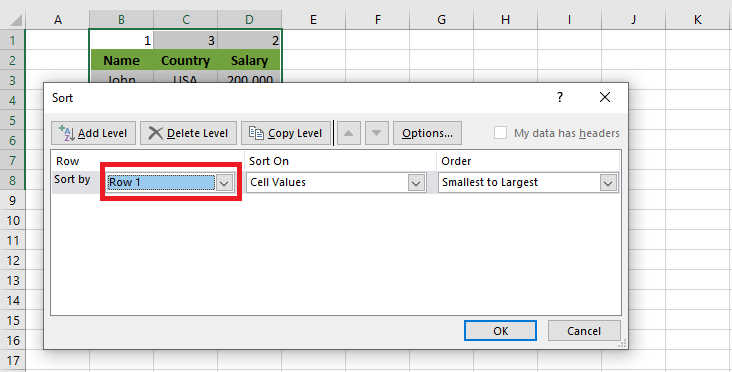
5. Select Row 1 from the Sort by drop-down list and click OK.
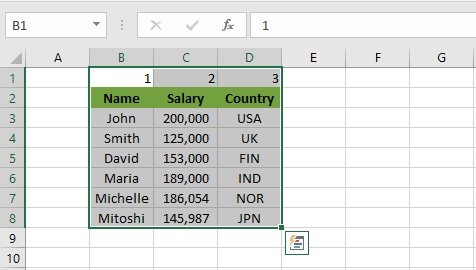
Result: you will have the sorted results as below. You may want to delete the first row, which was used to order the columns.
| 2 of 12 finished! Recommending more on the Range: Next Example >> |
| << Previous Example | Skip to Next Chapter 03: Understanding Workbook |