Protect Excel Workbook
This tutorial will show you how to protect Excel workbook from other users. That means other users cannot modify, insert, delete or do any type of changes in your workbook. Let’s follow the steps below:
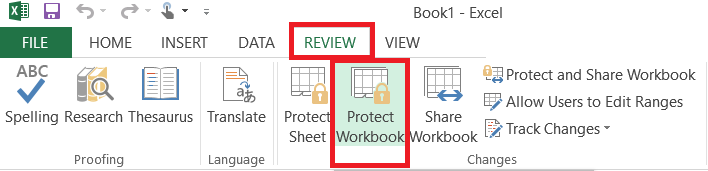
1. Open a workbook.
2. On the Review tab, go to Protect group and click on Protect Workbook.
3. Check “Structure”, put a password in the box, and click ok.
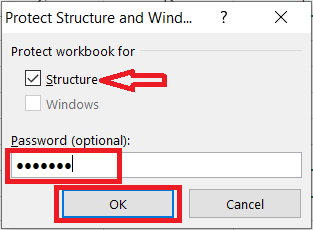
Note: In Excel 2013 and later versions, the window option is not available.
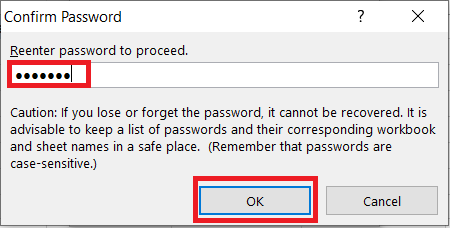
4. Re-enter the password and click on the OK button.
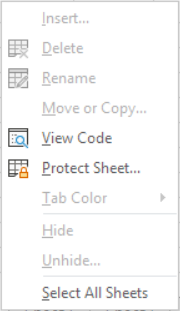
Now, other users cannot insert, delete, move, copy, rename, hide or unhide worksheets anymore.
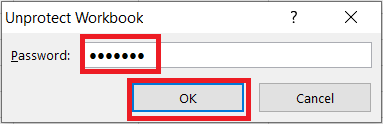
To unprotect the workbook, click on Protect Workbook and enter the password (the password is “protect”). Click ok.
| 2 of 6 finished! Recommending more on Protect Excel: Next Example >> |
| << Previous Example | Skip to Next Course: Data Analysis |