Excel AutoFill
To autofill in Excel, you can drag the cell by its fill handle or use Excel Flash Fill. You are going to learn each of these methods with examples below.
Example 1
1. Enter the value 15 in cell B2 and 20 in B3.
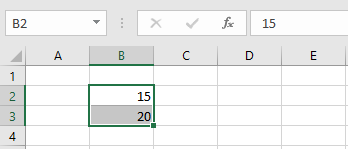
2. Select cells B2 and B3, drag the fill handle down. The fill handle, which is the little plus sign, is going to automatically fill the rest of the cells up to the point you wanted to fill.
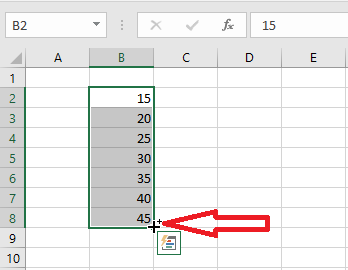
Note: The way AutoFill works is that Excel identifies a pattern from your selection (B2: B3). It then fills the rest of the cells by creating numbers while maintaining the same pattern.
Example 2
1. To let Excel automatically fill months, enter “Jan” in cell B2.
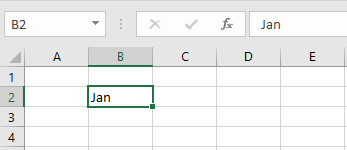
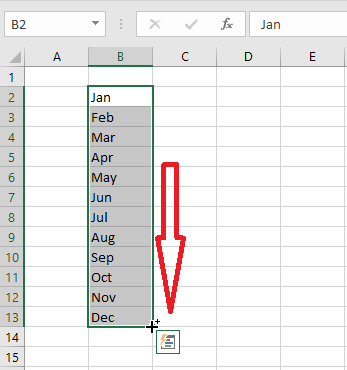
2. Now drag it down by the fill handle as you did previously. Excel will fill the rest of the months for you.
Example 3
Let’s try one more time using a calendar date.
1. Enter the date 03/03/2022 in cell B2.
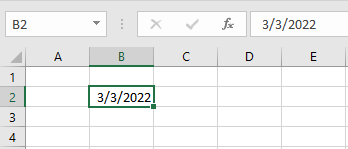
2. Select B2 and drag it down by the fill handle. Excel automatically fills the rest of the days.
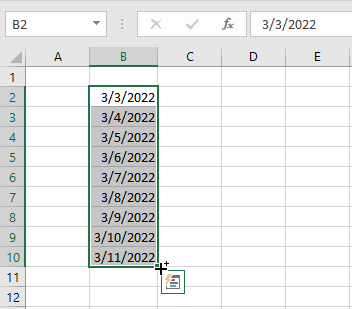
Note: You can now try out the day of the week or whatever pattern you like.
Example 4 – Flash Fill
We can use flash fill to automatically extract or combine cell information to fill in new cells.
1. Enter the value 200,000 in cell C3 to tell Excel what number to extract from cell B3.
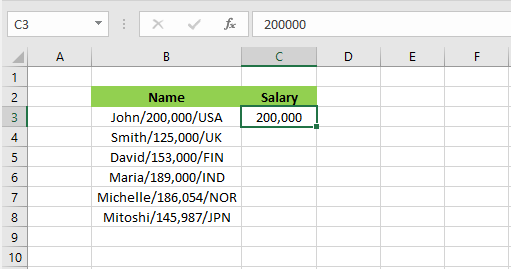
2. On the Data tab, click “Flash Fill” (Keyboard shortcut: CTRL+e).

Result: Excel will automatically fill in the rest of the cells as shown below.
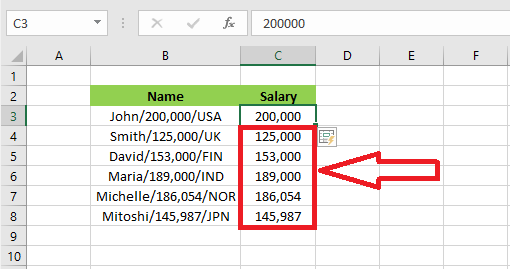
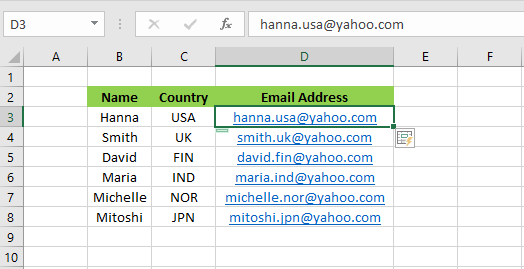
Flash fill can also combine information from two cells to create an email address.
3. Combine two cells’ information and create an email address manually in cell D3. Excel will then do the rest.
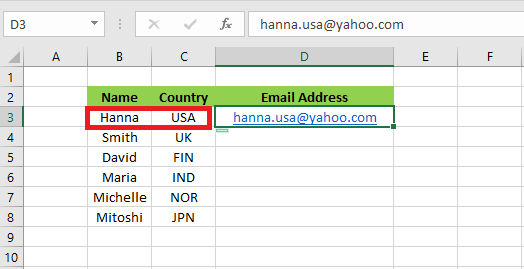
2. On the Data tab, click “Flash Fill” (Keyboard shortcut: CTRL+e).

Result: Excel will automatically fill in the rest of the cells as shown below.
| 7 of 12 finished! Recommending more on the Range: Next Example >> |
| << Previous Example | Skip to Next Chapter 03: Understanding Workbook |
