Create a Cash Budget in Excel
A cash budget is an important step in personal financial management. In this tutorial, you will learn how to create a cash budget in Excel. For this exercise, we assume that you have a basic understanding of using Excel. If not, we highly suggest you consider taking our 100% free Excel Basic Course from the beginning.
Let’s follow the steps below.
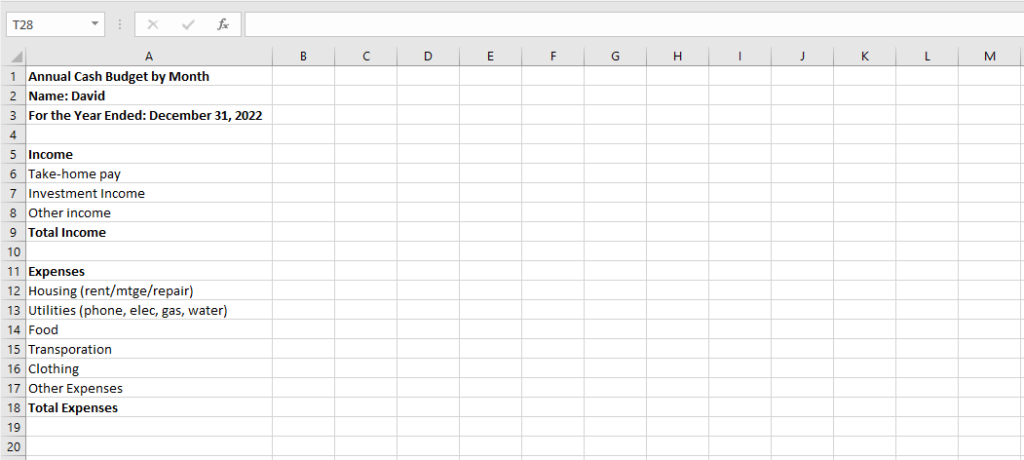
1. Enter the headlines of your cash budget in cells A1, A2, and A3.
2. Enter all of your income sources and expenses.
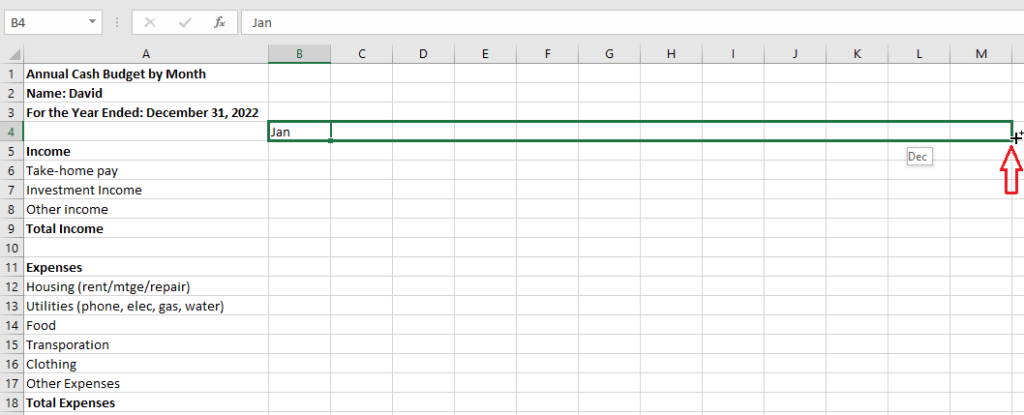
3. Enter Jan in cell B4. Using the fill handle of cell B4, drag it to the right to cell M4. Excel will automatically fill the rest of the months for you.
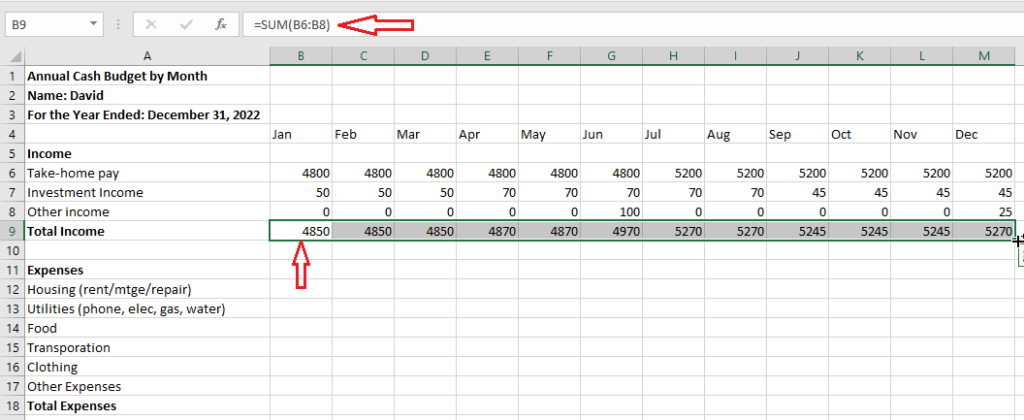
4. Write SUM function in cell B9. Again, using the fill handle of cell B9, drag it to the right to cell M9. Excel will automatically paste the SUM function in cells C9 to M9.
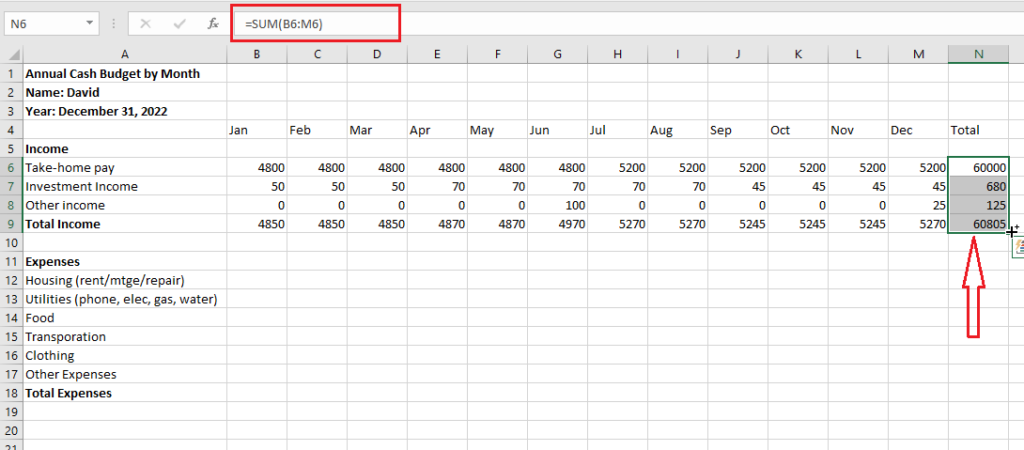
5. Write SUM function in cell N6. Again, using the fill handle of cell N6, drag it down to cell N9.
6. Now, repeat steps 4 and 5 for the expenses.
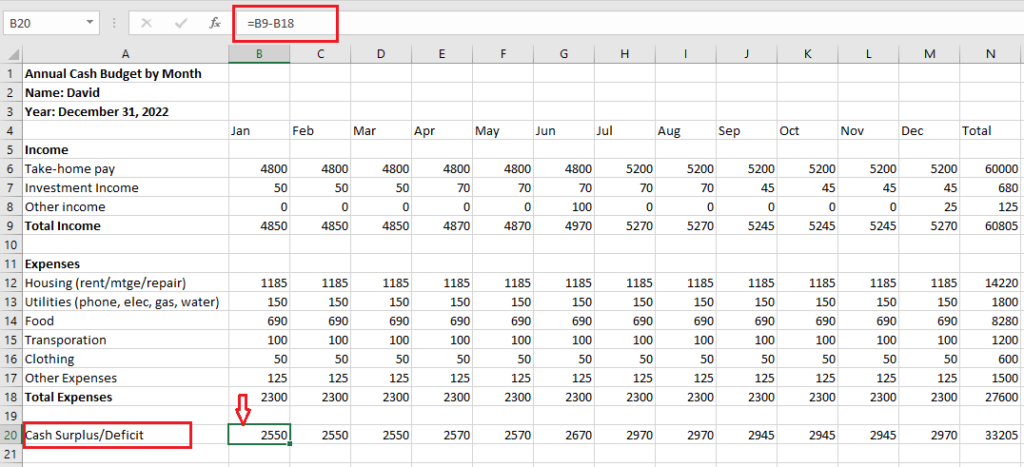
7. Type in Cash Surplus/Deficit in cell A20.
8. Subtract total expenses from your total income by writing a formula in cell B20. For instance =B9-B18.
9. Using the fill handle of cell B20, drag the formula to the right to cell N20.
10. We also applied conditional formating in cells B20 to N20, wherein any cell’s value greater than 2600 will be highlighted green and less than 2600 will be highlighted red.
Note: You can also set a condition wherein a cell’s value greater than 0 (surplus) will be highlighted green and less than 0 (deficit) will be highlighted red.
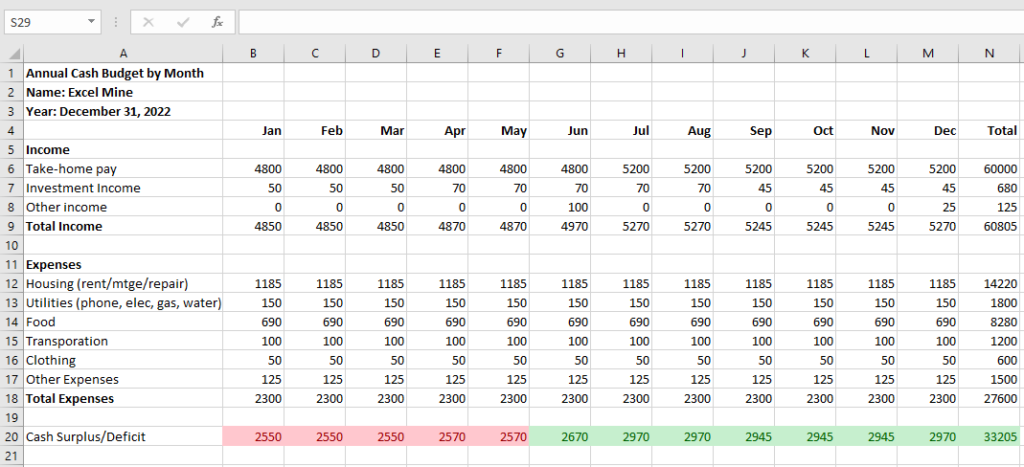
Result: Now, depending on your type of income/expenses, you can custom design this template in whatever way you like. To download our version of Cash Budget, click HERE.
| 2 of 5 finished! Recommending more on Find and Select: Next Example >> |
| << Previous Example | Skip to Next Chapter 10: Keyboard Shortcuts |
