Data Validation in Excel
Data validation in Excel is a useful tool to check if a user has entered the required values in a cell. For instance, you can design a cell in Excel in a way that a user can only enter a numeric value between 5 and 20. Below are steps that you can follow to create this rule.
We will create the rule first, where a user can only enter a numeric value from 5 to 20.
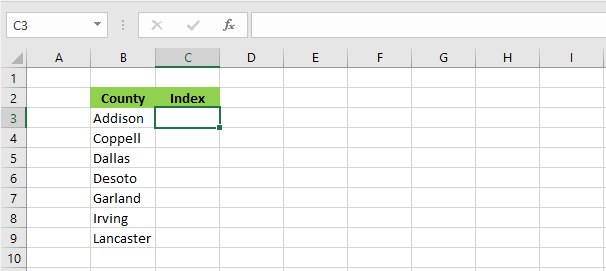
1. Select cell C3.
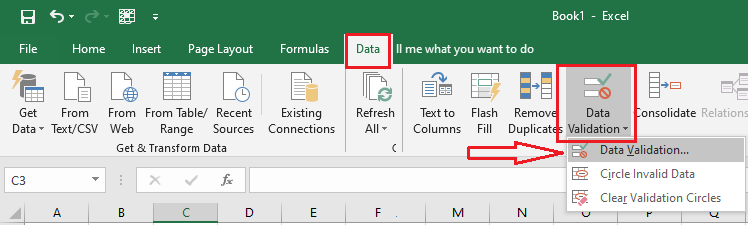
2. From the Data tab, click “Data Validation”.
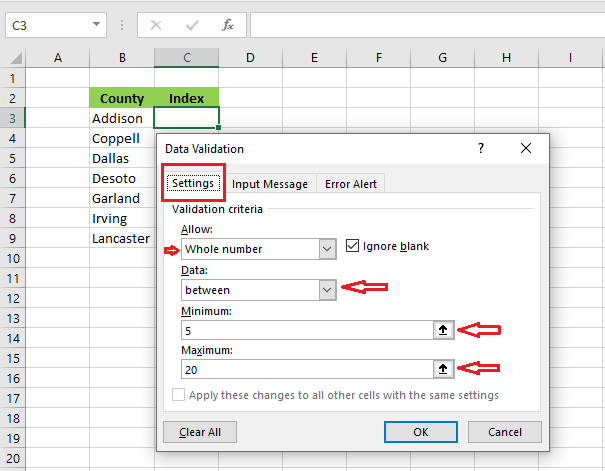
3. From the Settings tab of the Data Validation dialog box, select the whole number and between, and then type in a minimum of 5 and a maximum of 20.
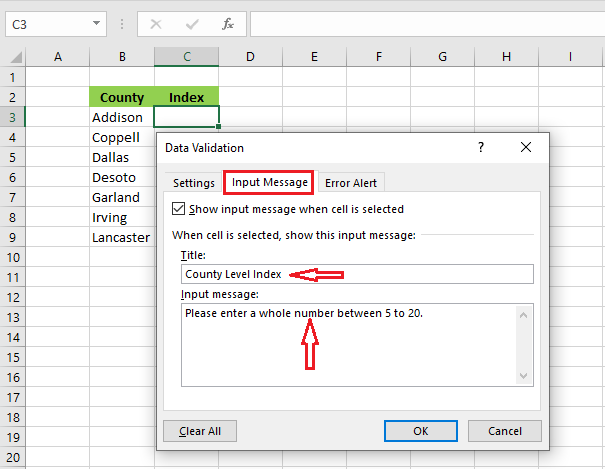
4. Click the Input Message tab. Type in the title as “County Level Index” and input message as “Please enter a whole number between 5 to 20”.
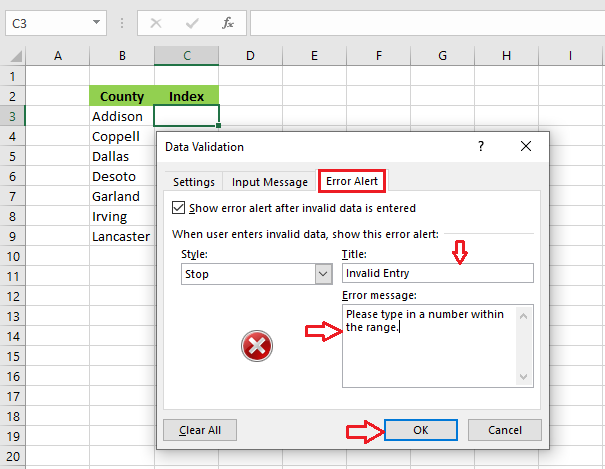
5. Click the Error Alert tab. . Type in the title as “Invalid Entry” and Error message as “Please type in a number within the range”.
6. Click OK.
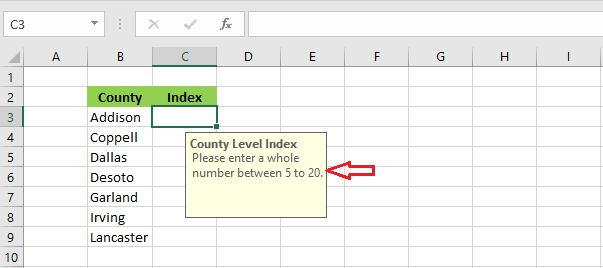
7. Select cell C3.
Now you see the yellow box instructing the user as to what to enter.
8. Try to enter a number that is outside the range of 5 to 20. For instance, we enter 25 in cell C3.
9. Press Enter.
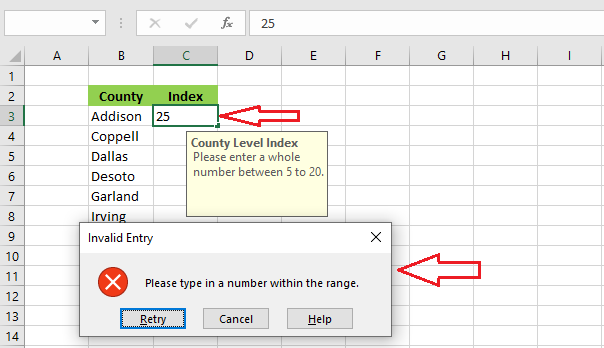
Result: Excel shows the warning message for the user as you have set.
Note: To remove all the data validation rules, select the cell and then click the Data tab -> Data Validation -> Clear All -> OK.
| 1 of 8 finished! Recommending more on Data Validation: Next Example >> |
| << Previous Example | Skip to Next Chapter 09: Using Templates |