Insert Bullet Points in Excel
In this tutorial, you will learn three different ways to insert bullet points in Excel.
Using Keyboard Shortcut
If your keyboard has a number pad on its right side, follow the steps below:
1. Press Alt + Numpad 7, to insert a round bullet point.

2. Press Alt + Numpad 9, to insert a hollow round bullet point.

Using Symbol
To insert a bullet point by using symbols, follow the steps below.
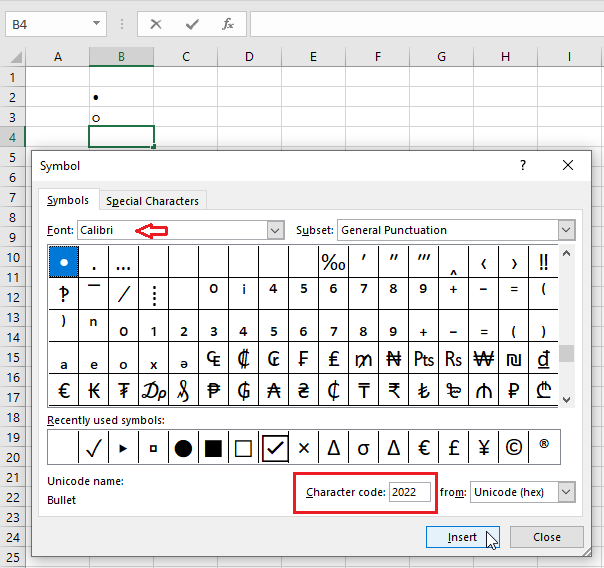
1. Click Insert Tab -> Symbol.
2. In the Dialog box, select a Font (Calibri) and type 2022 in the Character Code box. (You are free to use any font and symbols.)

3. Click Insert and then Close.
Result: you can see the bullet point inserted in cell B4.

4. To insert multiple bullets in a single cell, insert the first bullet point, and then press Alt + Enter key to go down. Now insert the second bullet. You will still remain in the same cell. When you are done, press Enter.

Using Custom Number Format
If you want Excel to insert bullet points automatically for you when you only write down the list of items, you need to create a Custom Number Format by following the steps below.
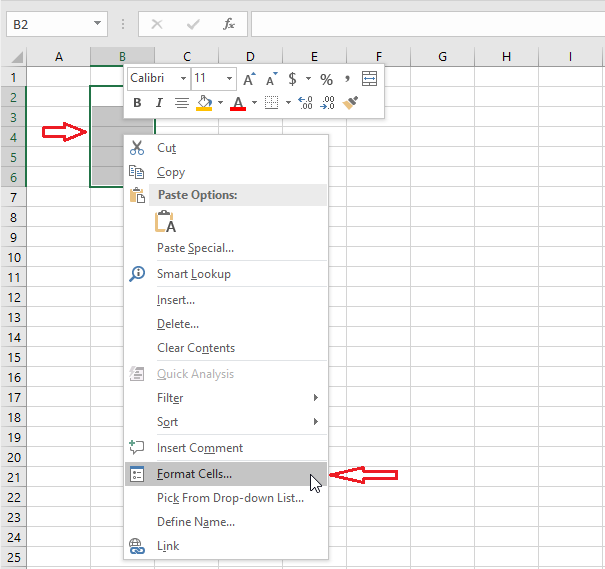
1. Select a range of cells B2:B6.
2. Right-click on the selected cell and click Format Cells in the pop-up menu.

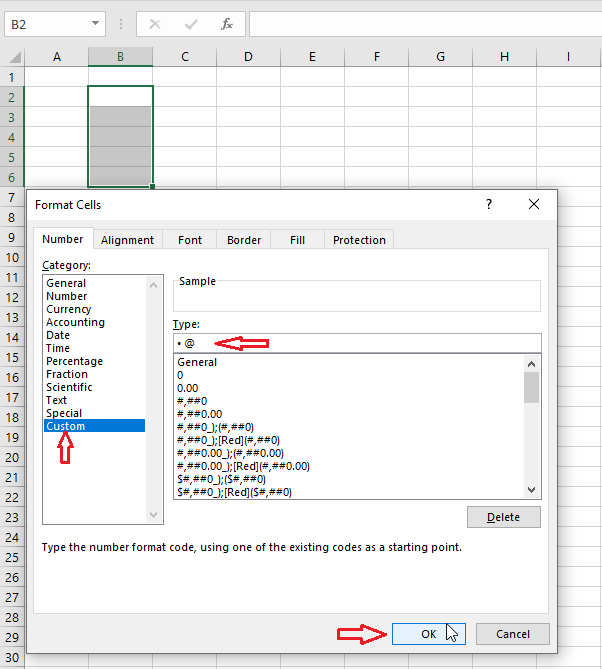
3. Select Custom.
4. In the Type area, insert a bullet by pressing Alt + Numpad 7, press space, and type @
5. Click OK.

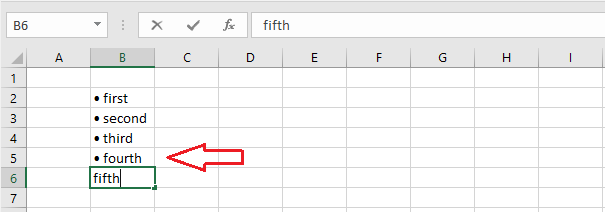
6. Now, type in your list, Excel will automatically put bullet points in the cells.

Note: to delete the custom bullet points in your Excel sheet, select cell or range of cells, go to the Custom Number Format dialog box, and click Delete. You can also use Format Painter to easily copy the Bullet Point format to other cells.
| 5 of 7 finished! Recommending more on Keyboard Shortcuts: Next Example >> |
| << Previous Example | Skip to Next Chapter 11: Printing Your Work |
