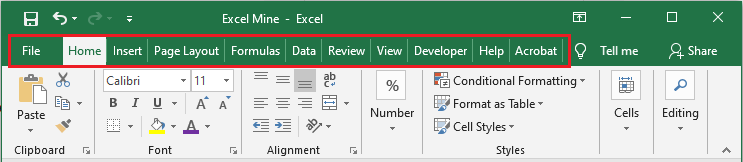
Excel Ribbon
At the start, Excel automatically selects the Home tab of the ribbon for you. Let’s learn more about Ribbon.
Tabs
Generally speaking, the tabs on the ribbon are File, Home, Insert, Page Layout, Formulas, Data, Review, View, and Help. However, additional tabs may appear when you add them to your ribbon. The most frequently used commands are contained in the Home tab.
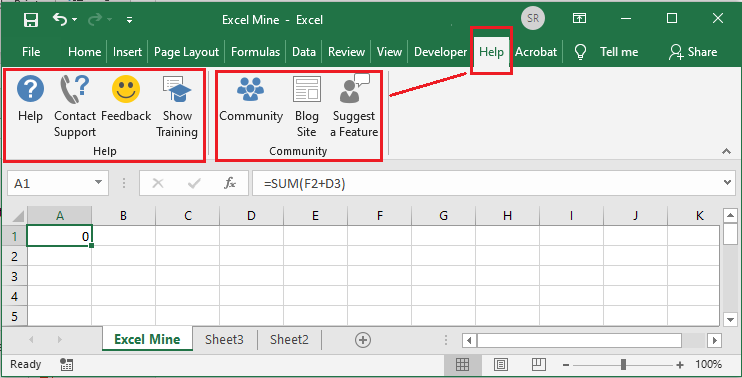
Groups
Each tab contains one or more groups of related commands. As an example, the “Help” tab contains a Help group and a Community group.
Using Ribbon
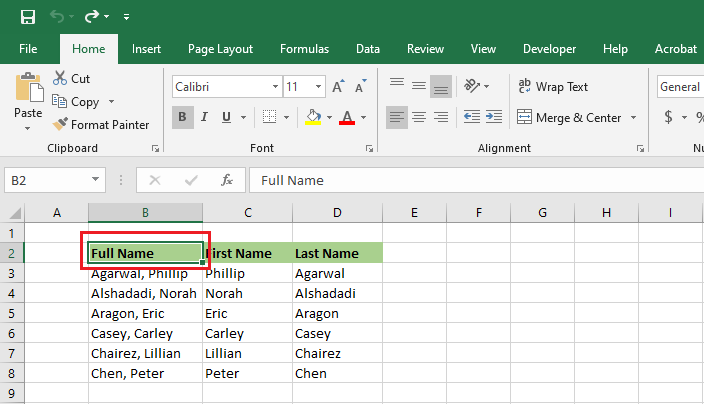
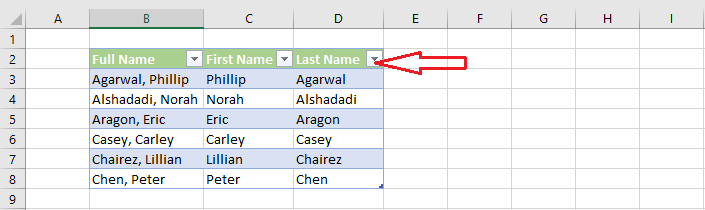
Let’s insert a table by using Ribbon.
1. Select Cell B2.
2. Click on the Insert tab and then click table.

3. Excel should automatically select the data for you. If your table has a header, check “My table has headers” and then click OK.
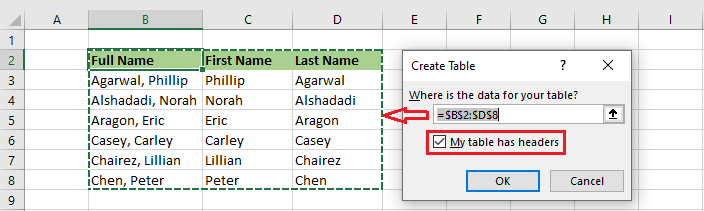
Result: Excel creates a beautiful table for you. Now, you can use the drop-down arrows to sort or filter data in the table.
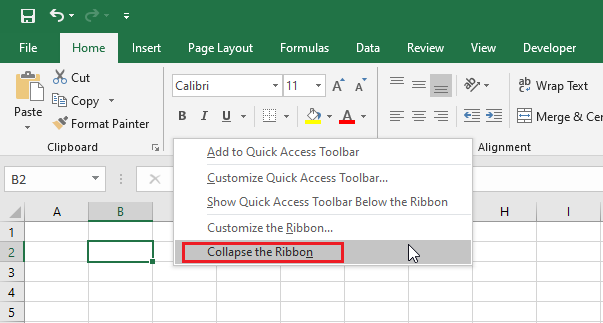
How to Collapse the Ribbon
The easy way to collapse the ribbon is to Right-click anywhere on the ribbon and then click “Collapse the Ribbon”. The keyboard shortcut is CTRL + F1. You get extra space on the screen/work area by collapsing the ribbon.
Result:
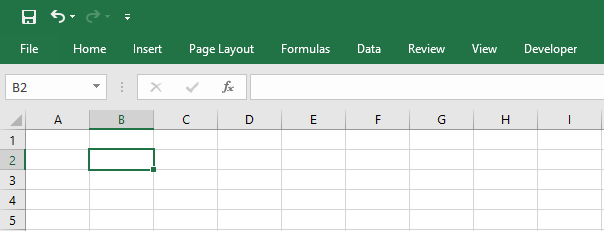
Note: To get the ribbon back or make the ribbon sticky, click on any tab and then right-click anywhere on the ribbon. Click again on “Collapse the Ribbon” so that the tick mark goes off.
| 2 of 7 finished! Recommending more on Excel Interface: Next Example >> |
| << Previous Example | Skip to Next Chapter 02: Using Range |